|
|
| Home-->F1 Rocket Project-->Setting up Shop |
|
SITE CONTENTS
Please send your comments and suggestions to: Copyright
© 2002-2005 by
|
Links
on this page: Shop Space Shop Tools The Hangar |
|
|
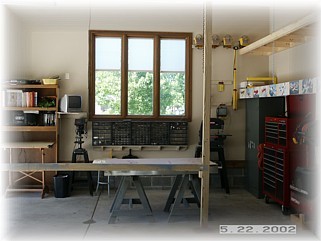
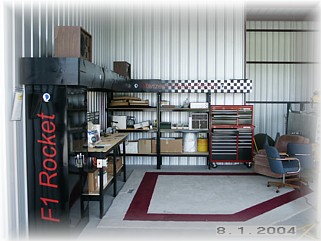
Airplane building shops come in all sizes and shapes. Most of the time, it is just a matter of making what you have work for you. I'm sure that if most of us had a choice and unlimited funds, we'd deck out our shops to the hilt. The question is often "How much space and how many tools do I really need to do a good job?". I finished up part of my Long-EZ project in a one car garage and I still parked my car in it! Other's have started projects in bedrooms, dining rooms, and basements. My advice is to get as much space as you can. You'll need it eventually. I was fortunate that when I built my current house, I was knee deep in my RV-6 project. While my wife decided what the rest of the house was going to look like, I had definite ideas on the garage. I've found my shop very convenient for building. I have enough room for tools and equipment against the walls, plenty of storage space for finished parts, a TV, stereo and heat. If I have to, I can park the cars in the driveway and install both wings on my project. The 4X4 frame in the picture is the temporary jig used for building the empennage and wings.
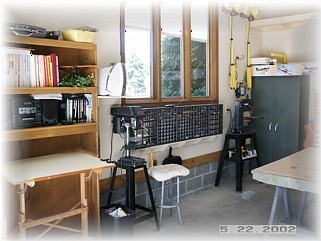
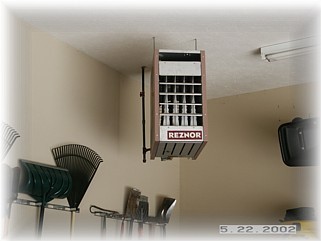
You need to give serious consideration to how you are going to heat your workspace if you live in a cold weather climate. In the Midwest, it is cold enough that supplemental heat is a requirement. Often, winter is the time of the year that you can get the most work completed on your project. Without the headaches of yard work, golf, and other outdoor activities, winter is the perfect time to "retreat to your shop". For many, many years, I used kerosene torpedo heaters. You have to be careful about carbon dioxide buildup, but these can be used effectively. A couple of years ago, I got a good deal on an overhead gas furnace. Now, I'm all set to build year round. I don't have a lot of large power tools or air tools. If you look around my shop, you just see a small drill press, small band saw, air compressor, and bench grinder. All but the band saw are required tools. I've found the band saw handy for cutting out parts, but I built two airplanes without it. Other items in my shop are a drawing table and bookshelf for keeping the plans and other documentation, a metal cabinet where I keep all combustible solvents, oils, wire, and painting supplies. I also installed a rack of small part bins. The first thing I do when I get a kit is to get ride of all the little bags of parts and put them in bins. It makes it so much easier to find stuff quickly while you're building. There is also a small computer on my workbench, but right now it's mostly gathering dust. I use it to run an electrical drawing tool that I can't get to run on my other PC.
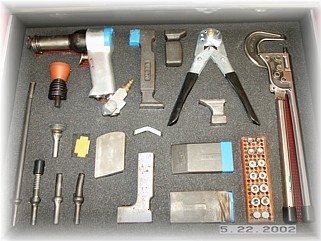
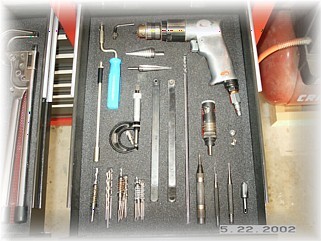
I have the basic set of hand tools from Avery. I organized them into side-by-side tool drawers in my chest for easy access. While I'm working on something, I usually have these two drawers open since they are within easy reach of my work table. I'm a believer that being organized, neat, and clean directly translates into your project. I know that not everyone is a "neat freak", and that's okay. I just find it more enjoyable for me to have the shop clean and well organized. I probably spend more time than I should tidying things up, but it ultimately makes me more happy about the project so what's the harm.
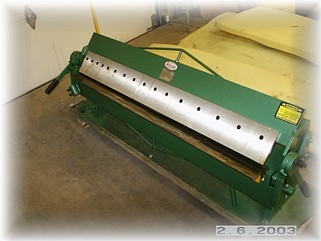
After fumbling with clamps and bars and other assorted work arounds to a bending brake, I finally broke down and ordered one. This one is a dandy one too. It is a 48" pan and box brake from Grizzly Industries. There are a number of important panels to make that fit inside the fuselage. Since this is an area that everyone will see, I figured I might as well do them right. I still haven't fully unpacked it yet and I will need to mount it on a movable table. Getting it up on a table will be a trick since this thing weights over 375 pounds!
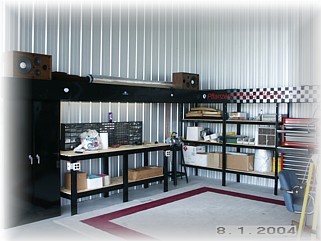
Well, it's two years later and now the airframe is at the hangar. I moved all my tools, parts, and equipment to my hangar at the Greenwood, Indiana airport. I had some vinyl graphics made of my web site name and posted them up on the header board. You can't see it too well in these pictures, but it looks good. I also painted all the benches black, since that will be the color of the Rocket when I'm done. I'm now all set for the home push. |
||
|
"Dream
as if you'll live forever. Live as if you'll die tomorrow." |